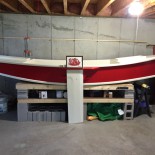
Han Learns to Build a Boat – Jim Michalak's Mayfly 14
…. and with no prior knowledge/experience in woodworking, boat building and sailing
Bottom – 3 bottom sections rough cut and block butt jointed
I wasn’t sure what type of wood to use for the butt joint as it probably need to handle a fair amount of stress.
Eventually, I decided to glue layers (3 layers of 1/4″ or 2 layers of 1/4″ +1/2″) of scrap plywood from side panel cutting with Titebond III because…
- It’s marine grade
- 2-3 layers of plywood should be stronger than one solid piece of wood
- It’s free

I glued (Titebond III) 3 layers of 1/4″ or 2 layers of 1/4″ and 1/2″ scrap plywood to make the blocks for bottom butt joints.
Center section and aft section of the boat bottom are jointed as shown in the picture below.
Epoxy+silica was used for gluing. I used masking tape whenever possible minimize the later effort of sanding.
I rounded the end edge of the aft side bottom. As you can see in the picture below, I obviously did not test cut with a scrap wood and router bit seemed to be lower than it should have been.
I really didn’t have a good idea how to fix this so the solution I made was to “add” some epoxy to the messed up area and then round the area with a router again. Well… there got to be many better ways to fix this kind of problem, but thankfully, this improvised solution worked.

Edge of the bottom that meets the end of the transom. Did not set the router bit depth properly for the first 2 inches.


